evaluate_saliency.py
Overview
This script evaluates a trained neural network on its salient features regarding the time and feature dimension and creates a saliency heatmap. The neural network should be trained beforehand.
Inputs
- ./data/<path_to_data_csv>.csv
- ./oracles/model_station
- ./targets/<model_name>/saliency.json
Plots and tensors
- ./oracles/interpretation/<model_name>/<date_time>_heatmap.png
- ./oracles/interpretation/<model_name>/<date_time>_save
Example Output Files
The output consists of the most salient features visualized in the form of a saliency map.
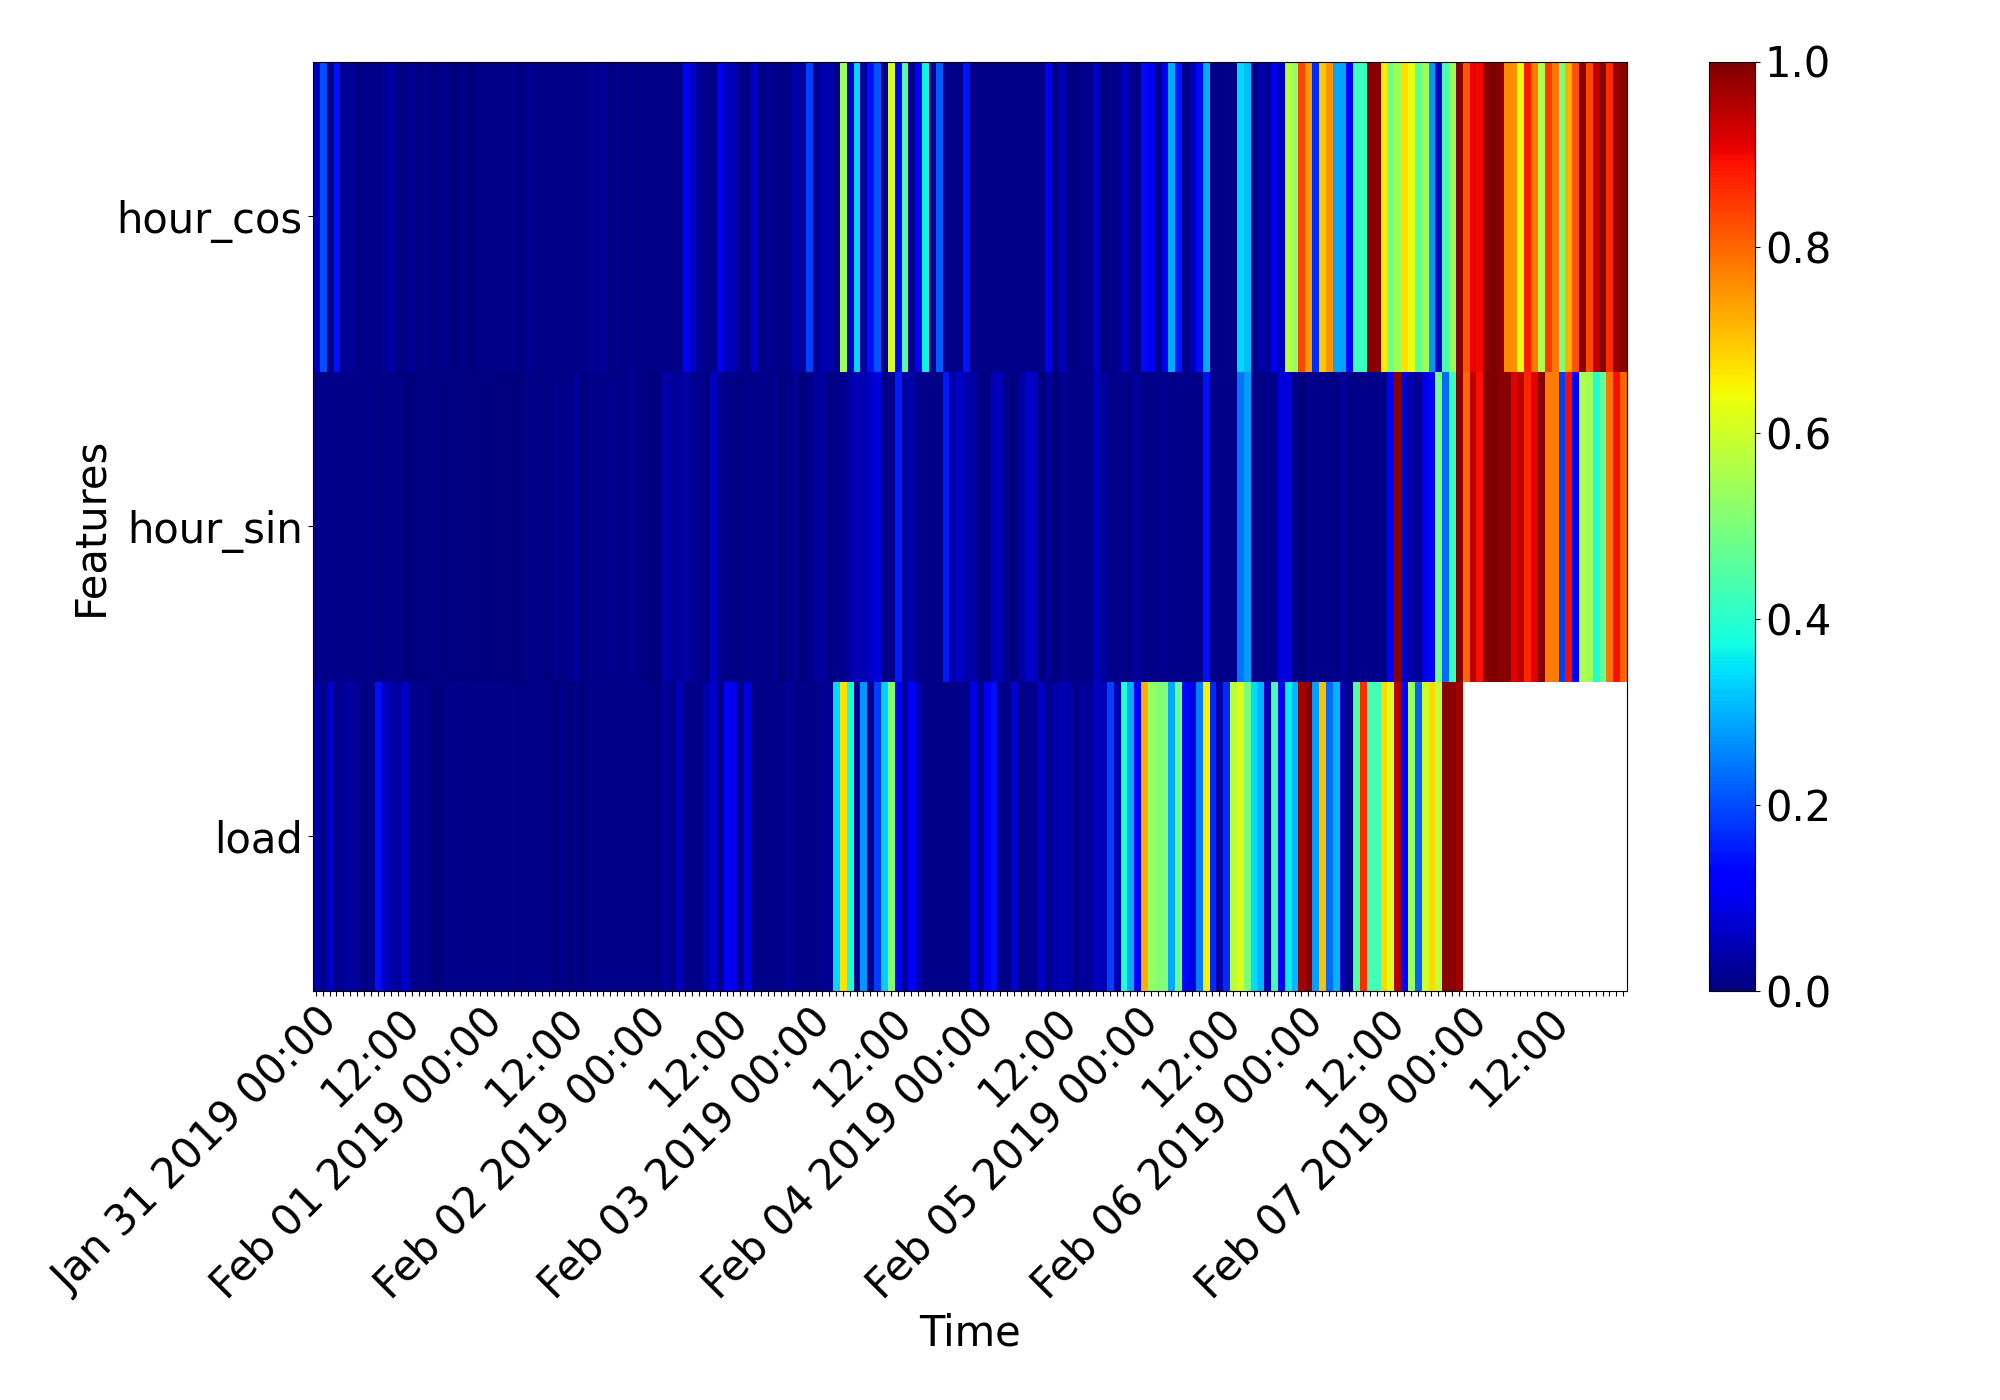
 Basic saliency map with 7 days long recent history horizon input (predictor variable load, and hour of the day) in the encoder and one day prediction. Decoder inputs are sinus and cosinus encoding of the hour of the day.
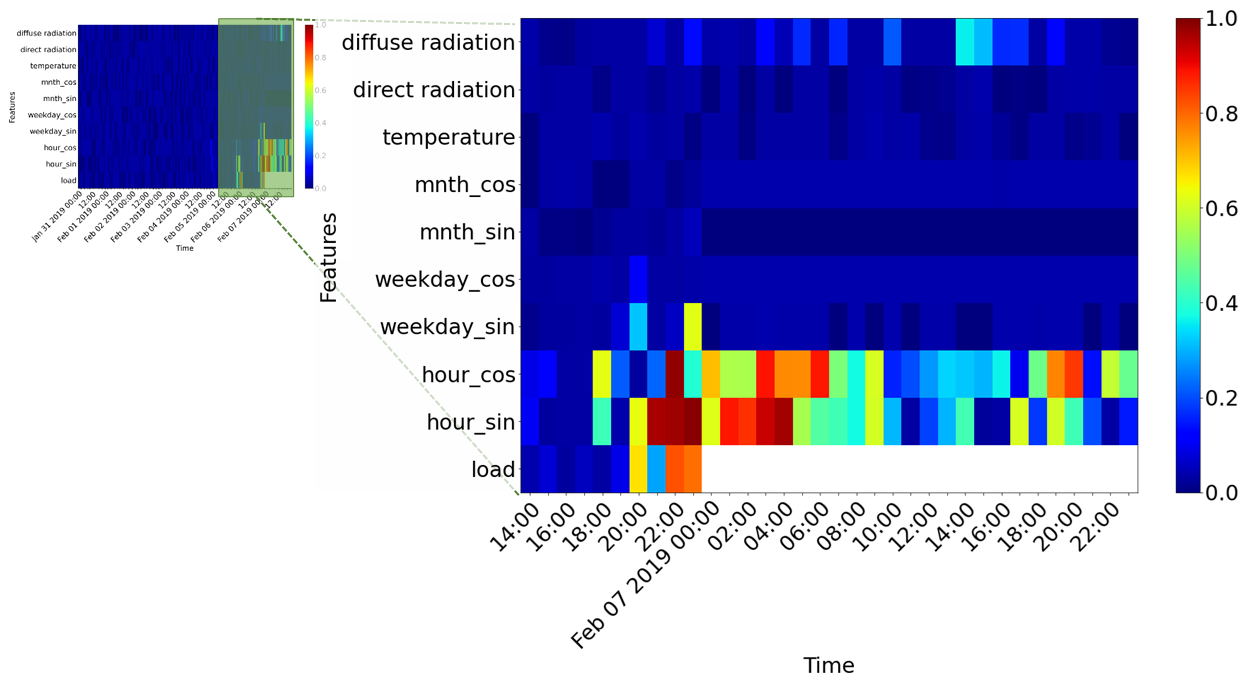
 Saliency map showing the importance of features per timestep op maintain the trained loss.
Step-by-step guide what the interpreter does:
Step 1: Preparations
Select and download the data on which you want to train a neural network on and put it in the data folder.
Make a new folder in the targets folder and put a config.json and tuning.json file within.
There you can set all the relevant paths and parameters. Now train the neural network on the data by using the train.py.
Now in saliency config in the same folder the following settings need to be made:
- set the
ref_batch_sizeto the number of references to use for each feature (recommended: At least 10) - set
max_epochsto the number of epochs of the saliency map optimization process (recommended: At least a few thousand) - set
n_trialsto the number of hyperparameter search trials to run (recommended: at least 30) - set
lr_lowto the lowest learning rate a trial should take for the optimization process - set
lr_highto the highest learning rate a trial should take for the optimization process - set
rel_interpretation_pathto the name of the output folder (recommended:oracles/interpretation/) - set
dateto the date for which the saliency map should be created for - set
lambdaaccording to how high big saliency map values should be penalizedlambda is the weight that determines the size of the mask weight error.
A high lambda value means that high mask values are penalized more in the objective function, so that the mask values turn out to be smaller overall.
A low lambda value means that high mask values are penalized less in the objective function, so that the mask values turn out to be bigger overall.
beware that the date indicates the beginning of the forecast horizon. Also the timestep should be identical to the one of the internal dataloader not the datasheet file in the data folder
Step 2: Run the Function
Now run the evaluate_saliency.py script with the -s <target_folder> flag. The function will now read in all the parameters it needs from the saliency.json file.
The trained net will be loaded and the saliency map is calculated for the given date.
The script also saves an instance of a saliency map handler class into
Step 3: Looking at the Results
After the evaluate_saliency.py script has finished a plot of the saliency map can be found in the <evaluation_path>/interpretation/<model name> folder.
Step 4: Other useful functions:
The script also saves an instance of a saliency map handler class into
<evaluation_path>/interpretation/<model_name>/<date>_save
This save file can be loaded with the load() function:
saliency_map_handler = proloaf.saliency_map.SaliencyMapHandler.load(<target_name>)
Now, with the class instance any of the following functions can be used
saliency_map_handler.plot_predictionsto plot the target, model prediction and mean perturbed predictionsaliency_map_handler.saliency_mapto access the saliency tensorssaliency_map_handler.model_predictionto access the model prediction tensors
For more information on existing methods have a look at the Reference